This is one of the cutest Buns I have seen online!
Created by Kaleiangel (T-kia) on NatuallyCurly.com. She calls the style the "Kinda Bun". I will be trying this one VERY soon! :) I just LOVE the "Messy" bun look!
She also has a great blog that I just adore! Check it out! Faith Favor & Curls
Friday, August 5, 2011
Sunday, July 31, 2011
Alternative to 2 Flat Twists & A Bun
Here is an alternative to 2 Flat Twists & A Bun that was posted on July 13th:
 |
| Here is the same type of style in the front but... I wanted to add large two-stand twists in the back. |
Improvements: Next time I will twist the front two-strand flat twists back more so that the ear to ear part will be covered. But I still wouldn't call it a total FAIL... lol :)

DRY Shampoo
I am looking for a product to keep my hair styles fresh in between washes... I came across Dry Shampoo! I have heard of it before but quickly dismissed it because like the site says alot of "us" think its not for us so we probably won't try it. I am going to try this very soon as it looks like it will do the job!
See this website for more information:
Coco & Creme ~ Black Hair & Dry Shampoo: The Myths & Right Uses
See this website for more information:
Coco & Creme ~ Black Hair & Dry Shampoo: The Myths & Right Uses
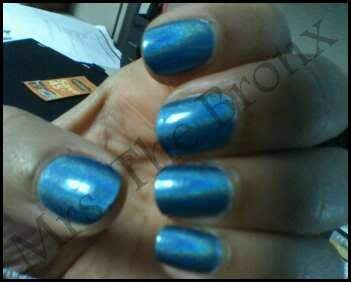
Holographic nail polish by China Glaze
I just love this holgraphic rainbow nail art design!
I used the 4 China Glaze holograpic nail polish colors from the mini haul below (the ones with the silver brush tops) to create this look. I used one coat of each color starting with the silver, the blue, the pink, the purple and ending with the blue again. Finished with a top coat of Sally Hansen's Insta-Dri nail polish.
I used the 4 China Glaze holograpic nail polish colors from the mini haul below (the ones with the silver brush tops) to create this look. I used one coat of each color starting with the silver, the blue, the pink, the purple and ending with the blue again. Finished with a top coat of Sally Hansen's Insta-Dri nail polish.
 |
| The picture really doesn't do this polish any justice! Its beautiful in the light! As ALL things. :) |
 |
| Mini Haul |
Friday, July 29, 2011
Rihanna's Lovely Side Braid

I saw this style and thought it was a really cute hair do, but in the comments under the article it was a hair-don't! Everyone seemed to think it was WACK!? Maybe I'm crazy, but I like it...
I'd love to try this style ASAP!
But with my own hair... Hmmm I wonder how that would look? lol I'm sure that it wouldn't have the hangage in the front like Rihanna's but I'd still like to try it anyway. :)

 |
| Love this! |
 |
| I think this is lovely! Black Voices Hair Talk |
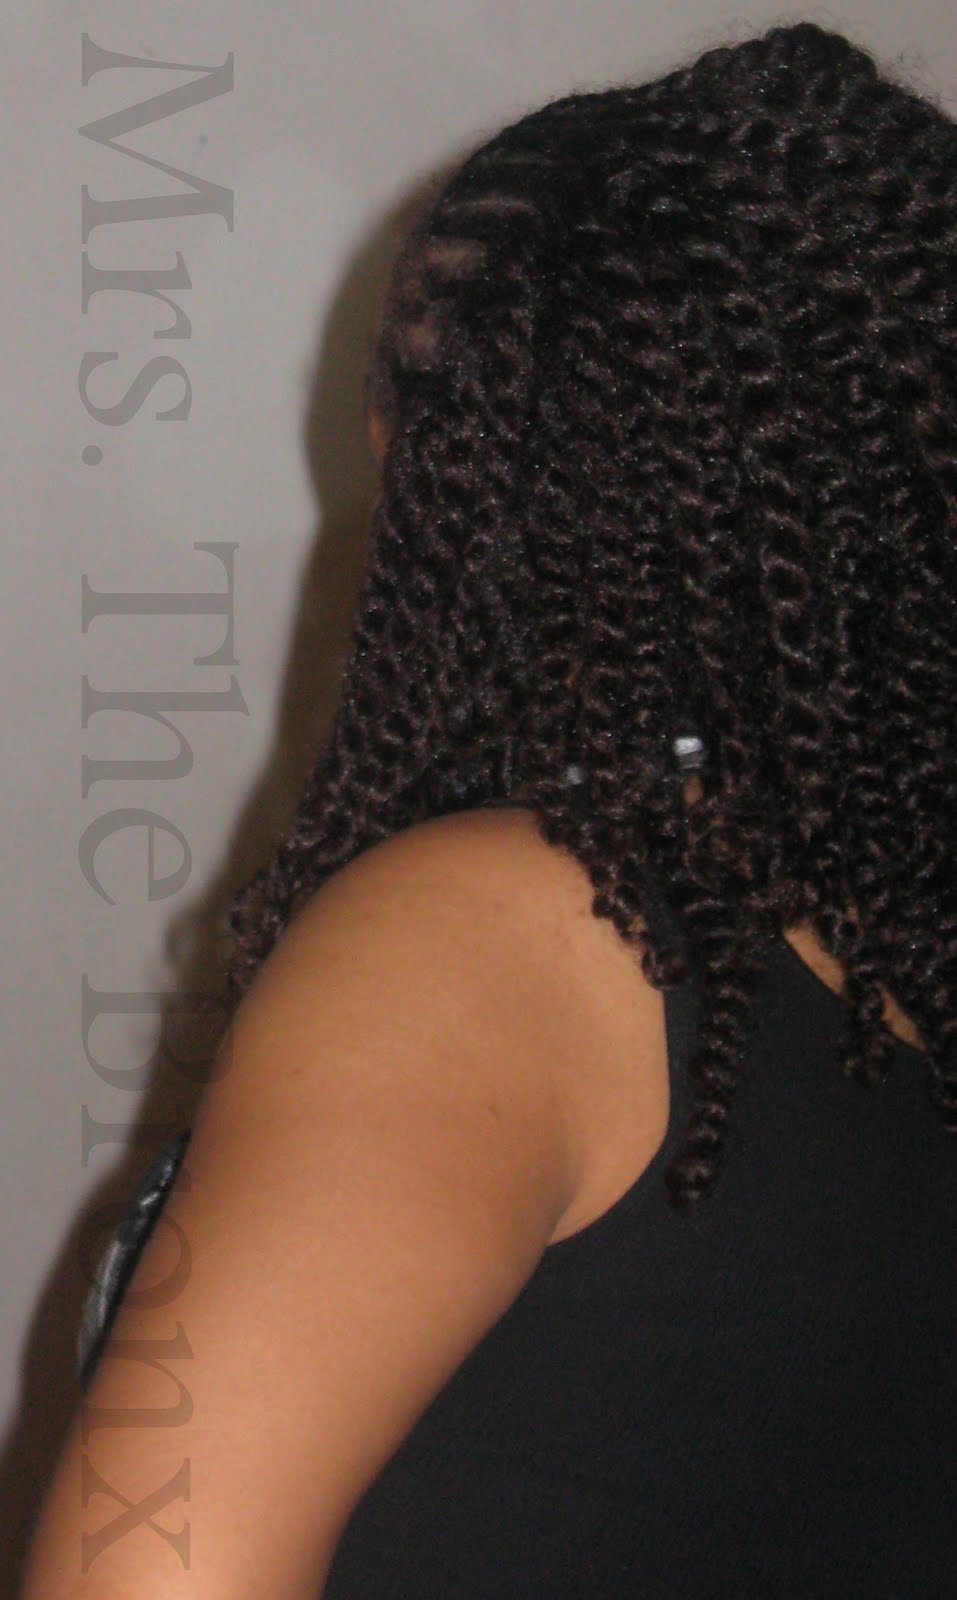
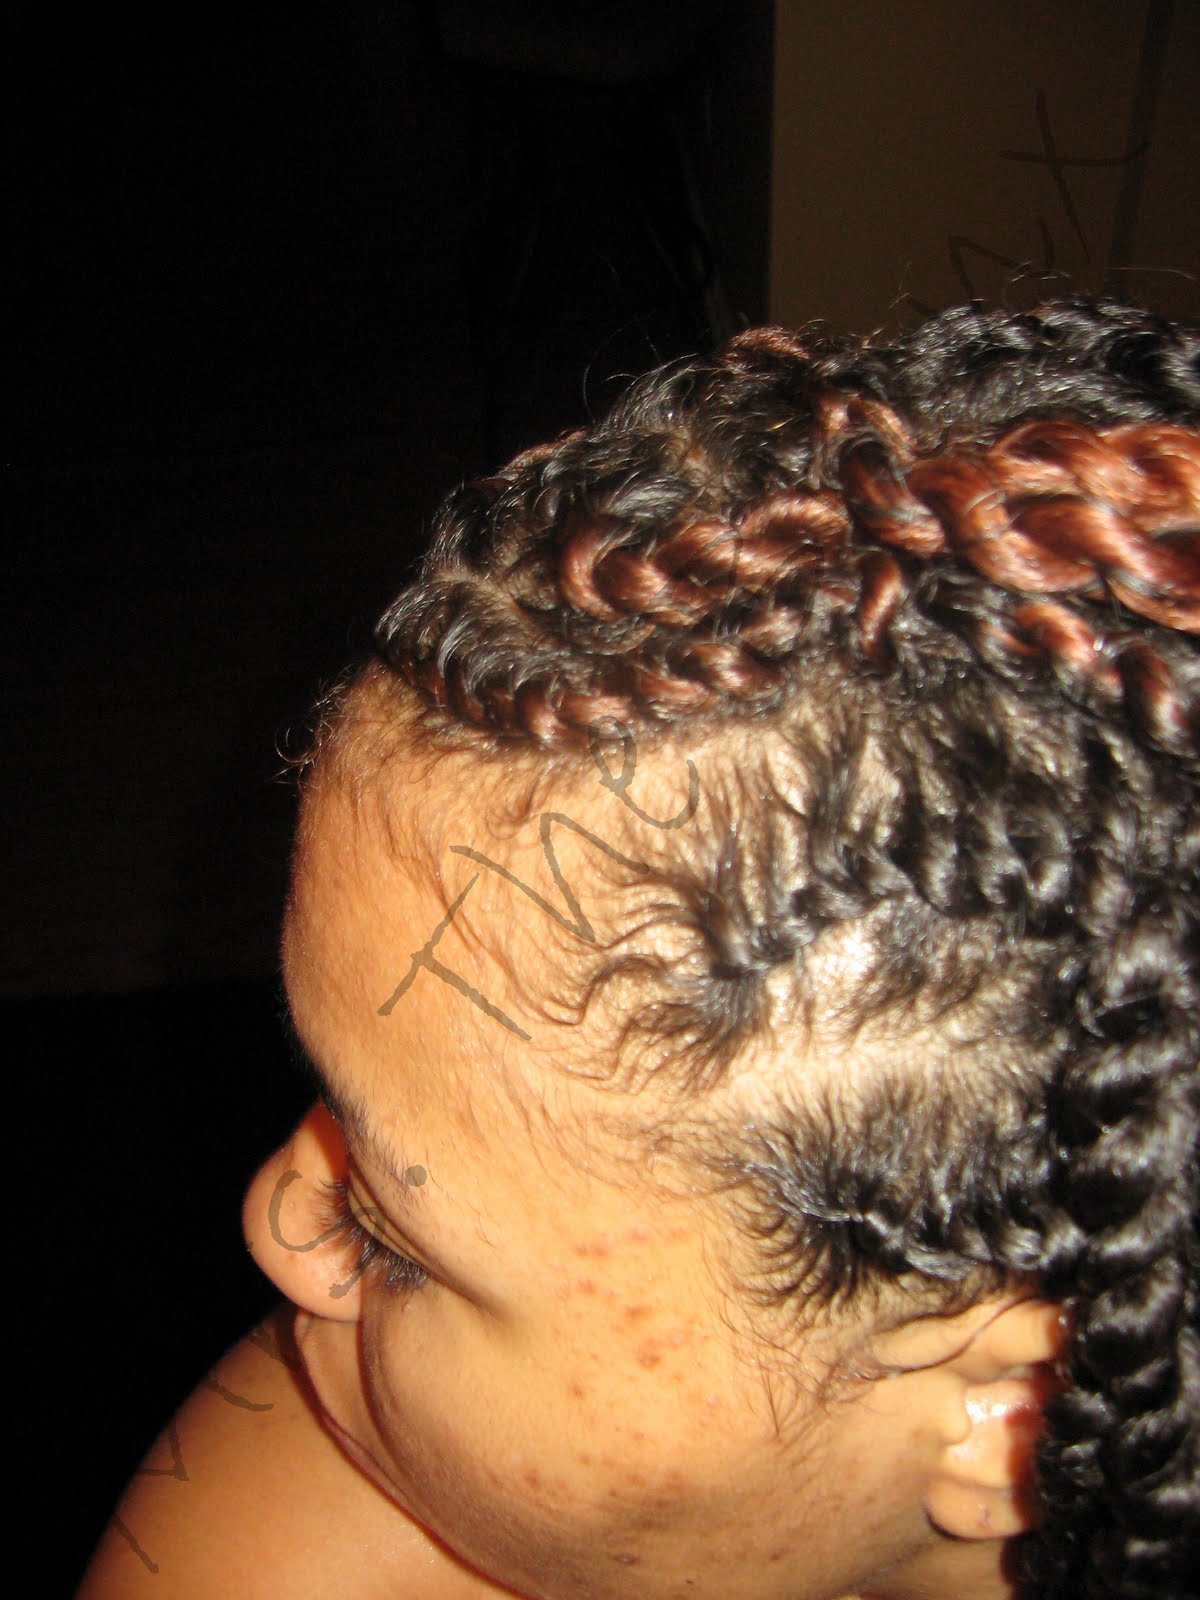
Cornrows & Dry Two-Strand Twists
As I stated in a previous post, I am cornrow challenged, so I got my best friend Danielle to cornrow the front of my hair. I just love this style because it keeps the hair out of my face and its ADORABLE!
Here it is:


For this style I washed and conditioned my hair. Added Jane Carter's Nourish & Shine to my hair and let it air dry as the front of my hair was being cornrowed. Once the front was completed, I two-strand twisted the back and finished up with some coconut oil.
Here it is:

Thursday, July 28, 2011
Konad Zebra Print Nails
Here is one of my absolute favorite designs done with my FAVORITE Konad stamping kit! If you dont have one yet, you need to get one!! LOL
This was done after a home manicure:

This was done after a home manicure:
- Removed old nail polish
- Soaked nails in soapy water with a lil oil in it
- Trimmed cuticles a little
- Shaped nails with nail file
- Painted nails with Orly Bonder and Clear nail polish
- Proceeded with STAMPING! :)
- LEFT THIS STEP OUT... Remove excess zebra prints from around your finger nail with Q-tip and nail polish remover
- Sealed the design with Sally Hansen Quick Dry Top Coat (Red Bottle)

I KONAD!
KONAD! From Dealer to Kneeler
A good friend of mine sent me this link and it was sooo awesome that I had to share it!
Check it out!
AWESOME TESTIMONY ~ From Dealer to Kneeler
Check it out!
AWESOME TESTIMONY ~ From Dealer to Kneeler
Wednesday, July 27, 2011
I praise YOU God...

For a creating a changed heart in me!
For Your unconditional love!
For Your grace and mercy!
For being a God of restoration, peace, love, endurance, healing and so much more!
For the sister's in Christ You have assigned just for me!
For the natural gifts that You have given me!
For True FREEDOM!
For BOLDNESS to profess Your Holy Name!
For constantly using rotten ol' me to build Your Kingdom!
This month alone you have done some wonderful changing, molding and shaping in me that only You can be responsible for! Hubby even noticed and commented via a spontaneous phone call thanking his wife on the changes that he had noticed that I hadn't even realize happened!
That is the physical evidence that its ALL YOU! :) Spiritually, You are the ONLY one who can change a heart but sometimes we can't see that far, it has to be a physical manifestation of You for us to see it. I thank You for making it clear for us!
HOW AWESOME ARE YOU?! With You EVERYTHING is just plain ol' better!
I give Your name ALL the honor, glory and the praise!
Thank YOU God! :)
Tuesday, July 26, 2011
Curlformers
I purchased a Curlformer's kit from Sally's at the beginning of the year and did not use them as I realized I needed the extra long curlers due to my hair hanging out of the regular ones. :(
Used the curlers on my sisters hair last week and the curls came out gorgeous!

- Washed and Conditioned her hair
- Finger parted medium sized portions of her hair and added Aphogee Foam Setting lotion to her hair
- Set her hair with the Curlformers and sat her under a cool bonnet style dryer for about 45 minutes. She actually winded up sleeping in the curlers.
- Removed the curlers in the morning, separated the curls just a bit with some Coconut oil on my finger tips and here are the results:


I will need to save a few bucks so that I can buy some extra long curlers for myself!
I ♥ Curlformers!

Monday, July 25, 2011
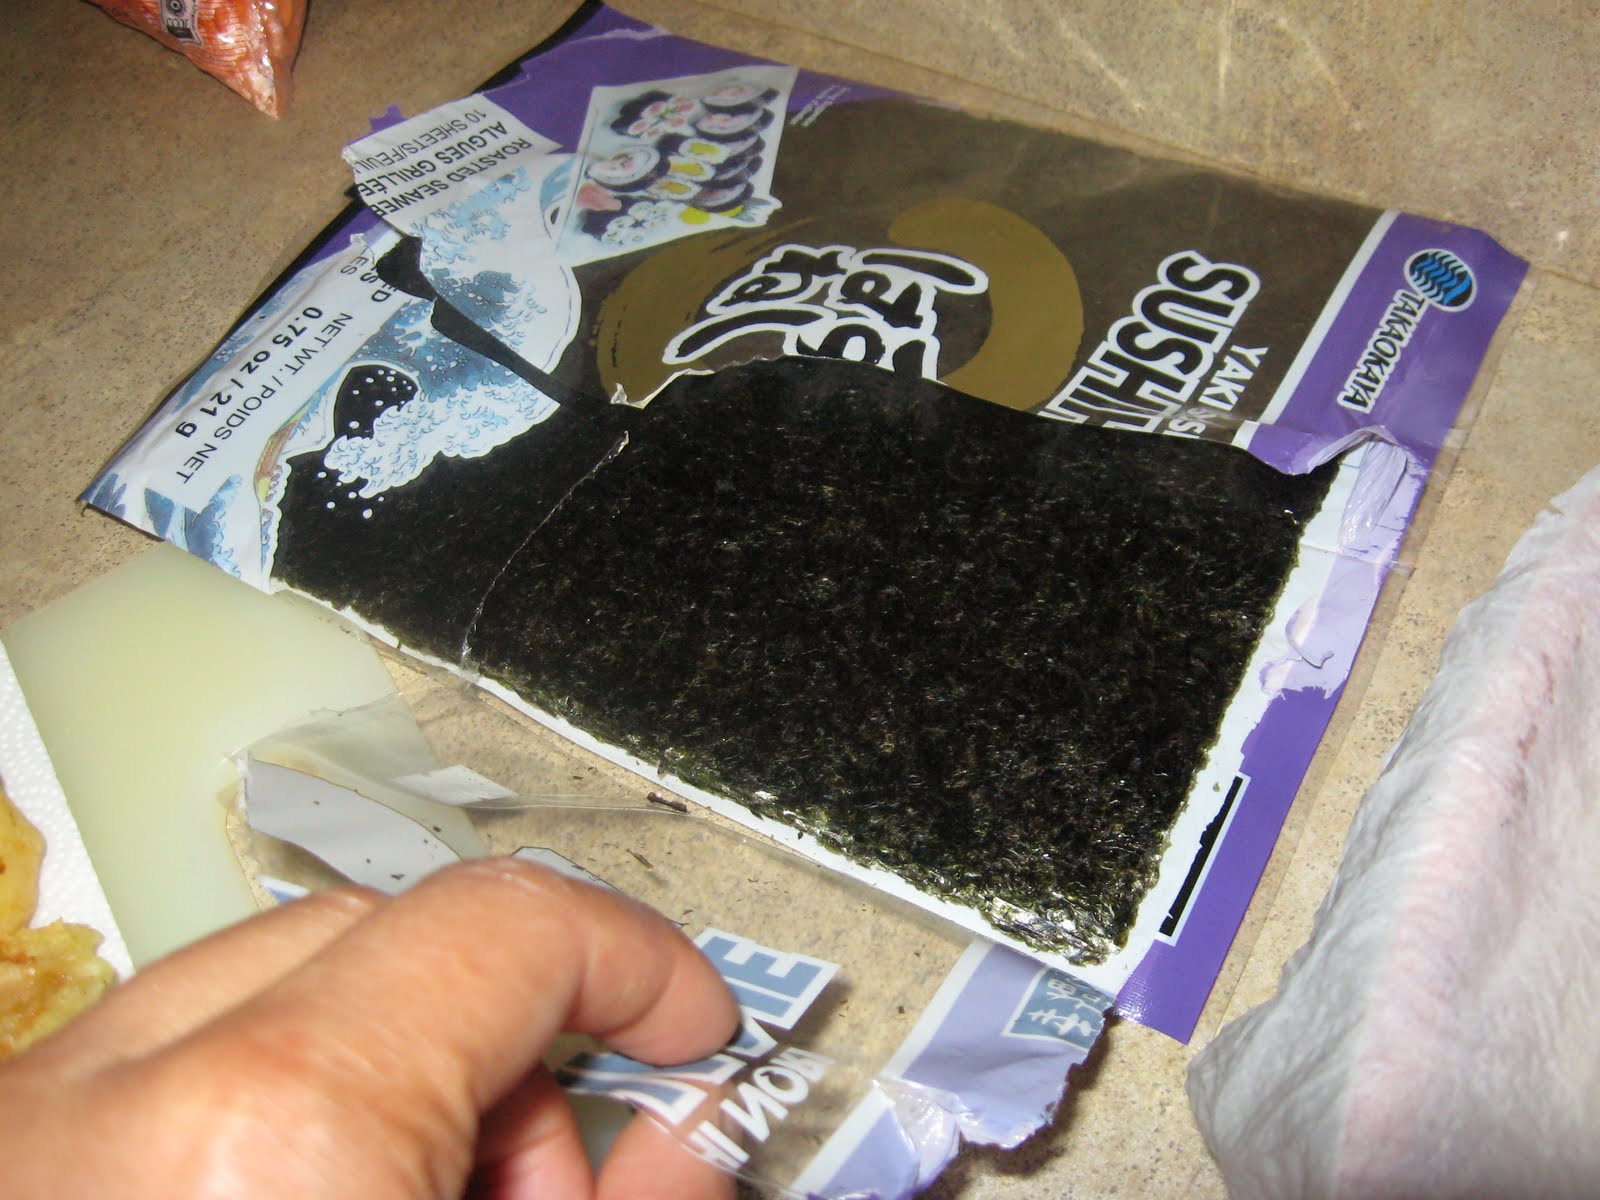
My first attempt at D.I.Y. SUSHI!
My sister and I wanted to make sushi over the weekend so we went out and brought a kit from Barnes & Noble (It was only about 8 dollars!)
It came with the book, the spoon for rice, and 4 sets of chop sticks:

We visited the local Asian market and brought:
Rice seasoning packet
Nori (Seaweed used to wrap sushi)
Tempora batter
Low-sodium Soy sauce
Ginger
Spicy Mayo packet
Visted the grocery store for the rest of the items:
Carrots
Cucumber
Crab Meat
Raw Shrimp
French's Fried Onion pieces
Brown Rice
Here are the steps we took to make the sushi:
- Cooked the rice, added the rice seasoning packet and hand fanned the rice to cool it down. This is important to keep the correct consistancy of the rice. Covered the rice with a moist towel to retain the moisture in the rice.
- Heated the oil for the shrimp, made the tempora batter, cleaned the shrimp and fried them. Placed the fried shrimp on a towel to extract some of the oil from the fryer.
- Cut up the cucumber, carrots, shrimp and crab meat into neat strips.
- Opened up the kit and put the bamboo mats in a plastic bag to keep them from getting food on them.
- Set out a flat bowl filled with water to keep out hands moist as we roll the sushi. Also set out a sharp knife to cut the sushi after they have been rolled.
- Grabbed the Nori, placed it shiny side down. Wet my hands a bit and grabbed some rice and placed it on the Nori leaving a little less than 1/4 of the Nori exposed. Added my veggies, shrimp and crab meat to the middle of the rice and began to roll the Nori. Carefully rolling to ensure the roll is tight. Removed the mat and wet the exposed portion of the Nori so that it will stick and close securely.
- Cut the Sushi rolls in 8 pieces and added the Spicy Mayo and Onion Straws and we were all done! They were yummy! :)


Friday, July 22, 2011
This weekend's style (Jul22)
I am cornrow challenged so most of my styles will be two strand flat twist... :) I wanted my hair pushed back in the front and two strand twists in the back.
This is what I came up with:


This style wasn't too difficult. I made two medium sized flat twists on each side of my head. I made a zig-zag part in the middle area of my head and at the beginning of each of the zig-zag points is where I started the flat twists twisting toward the middle of my head. The rest of the hair in the back was two-strand twisted.
Products used:
Rat-tail comb for parting
Denman brush for making sure the hair was in order while twisting
Gel Mixture (ORS gel, Royal roots twist gel, Jamaican mango & lime twist gel)
Organic Extra Virgin Coconut oil
This is what I came up with:

I will keep the two-strand twists in the back in for 1 week and then do a twist out in the back and maintain the front flat-twist.

Adding a few more view angles for delitefulmane


Wednesday, July 20, 2011
Combs & Brushes
This may have been posted a million times on various blogs but I just loved the comb and brush information on this website!
Combs and Brushes 101
I just love love love the Denman brush! I use it anytime my hair is full of conditioner and I want to detangle my hair. I think I only use a comb when I part my hair, which is very rarely! The Denman brush creates chunky curls in my hair! Love it! I get my Denman D4 brushes from Sally's BSS. Try it!
No more loc's
I know its been a few months without my hubby's locs... but ohhhh how I miss them so!
Below is the last time I re-twisted and styled his hair... :( When I asked him why he wanted to cut them, he said "God wants to do a new thing in me"... How could I argue with that?
I can't say that I don't hope he changes his mind and grows them back! LOL We shall see!


Below is the last time I re-twisted and styled his hair... :( When I asked him why he wanted to cut them, he said "God wants to do a new thing in me"... How could I argue with that?
I can't say that I don't hope he changes his mind and grows them back! LOL We shall see!

Now...

Sunday, July 17, 2011
CreamSickle Swirl...
I did this design a few months ago, but decided to post it anyway! Loved it! :)
I used Orly Nail Bonder
Followed up with Chelsea by Zoya
Then used a nail dot tool with black and white nail polish to create the dots
Finally used 1 rhinestone per nail to create the look below:
![]()
I used Orly Nail Bonder
Followed up with Chelsea by Zoya
Then used a nail dot tool with black and white nail polish to create the dots
Finally used 1 rhinestone per nail to create the look below:

Friday, July 15, 2011
♥ Red Curls ♥
I think I mentioned that I use the Matrix line to color my hair.
In the below picture, I have washed, conditioned, blow dryed and flat ironed my hair.
Then I took medium sized chunks of hair and used the rollers below to create the curled look.
I curled my hair like this every night. For me, it takes about 10-15 minutes to curl it all... or if you want a looser curl, just throw on your bonnet and don't worry about the curlers and it still looks great!
Got these from Walmart! Make sure that any foam roller that you may use is satin wrapped! That will ensure your hair will not dry out nor will it break off in the foam on the roller.
I just ♥ these curlers!
Here's the Curls that the above curlers produce:

The next day... in dim light:

Wednesday, July 13, 2011
2 Flat Twists & A Bun
I just ♥ this style!
It takes me only 10 minutes to complete after a wash or co-wash and it looks cute too!
![]()
![]()
It takes me only 10 minutes to complete after a wash or co-wash and it looks cute too!
- In the picture below I co-washed my hair, moisturized and sealed with Jane Carter's Nourish and Shine and Coconut Oil.
- Parted my hair from ear to ear and made a part almost like a "T" but slanted in the front.
- Two-Strand flat twisted the first one starting at the front of my head and the other starting at the middle of my head to make a swirl effect in the front.
- Put the back portion of my hair in a ponytail
- Wrapped the 2 front twists around the ponytail
- Finally, gathered all of the hair into a neat lil' bun
- Secure with a bobby pin and you are done!

It's not all its CRACKED up to be...
I love this look!
The base is a shade of blue (will add the name later) by Sally Hansen and Katy Perry's black crackle nail polish on top. This worked out great for me the 1st time, but seems as though the crakle polish was very thick on the 2nd use?! Almost too think to use! I will try this look again but with a new bottle of crackle polish.
BTW the Sally Hansen line of Crackle nail polish did NOT work... well, I will speak for the one I tried which was the red one. I looked like a thin coat of cheap polish. :( I love Sally Hansen polish, but this one was not good.
![]()
The base is a shade of blue (will add the name later) by Sally Hansen and Katy Perry's black crackle nail polish on top. This worked out great for me the 1st time, but seems as though the crakle polish was very thick on the 2nd use?! Almost too think to use! I will try this look again but with a new bottle of crackle polish.
BTW the Sally Hansen line of Crackle nail polish did NOT work... well, I will speak for the one I tried which was the red one. I looked like a thin coat of cheap polish. :( I love Sally Hansen polish, but this one was not good.

Organic Rebellion!!!
I spoke with a friend yesterday about nutrition and she told me she's been preparing a lot of raw meals for her household (more to come on that) so I decided that I need to eat more healthy also! Thanks Siobhan, lol :)
So in my quest for all things HEALTHY... Organic supermarkets in my area popped in my head. Yeah, I know they are a little hard on the pocket, but I think shopping at these types of supermarkets for certain items (Produce, Meats, etc.) will be beneficial for my household.
I located this link on a store website... I thought I'd share it!
Check it out!
Grocery Store Wars
Monday, July 11, 2011
Natural Woman
Don't know how many ladies got to see this but check it out when you can... ENJOY!
Natural Woman Documentary
NATURAL WOMAN FILM (2009)
DIRECTED and EDITED by CINDY HURST
(00:27:30)
This film addresses the psychological and philosophical implications that occur when African-American women decide to stop straightening their hair and wear it naturally. It includes interviews with activist and African-Black Psychologist, Dr. Na’im Akbar, noted author, Dr. Darryl Scriven, and a diverse group of girls and women who give narratives of their individual hair journeys.
Saturday, July 9, 2011
The Trap of Discouragement
This was today's Daily Reading from Charles Stanley ~ InTouch.org
Had to post this one, it was really good! BE Encouraged! :)
Had to post this one, it was really good! BE Encouraged! :)
July 9, 2011
The Trap of Discouragement
HABAKKUK 1:2
Do you feel stuck in discouragement? If so, you are not alone.
At some point everyone experiences dashed hopes. Disappointment—an emotional response to a failed expectation—is the normal initial reaction. But allowed to linger, it can turn into discouragement, which hovers like a dense cloud. When that's the case, there is no sense of joy or contentment, no matter what you do.
The circumstances that trigger these emotions may be unavoidable, but the way we respond is a choice. We can either let sadness overwhelm our souls or face the situation with courage and bring it before the One who can help us.
Living in discouragement will divide the mind, making it hard to focus on anything besides our pain. Then as anger becomes habitual, we'll look for someone to blame—whether God, people around us, or ourself.
Frustration that isn't handled well may develop into depression, which in turn can estrange us from others—people do not enjoy the company of someone who's bitter and defeated. This isolation leads to a low self-esteem. Finally, in a fog of discouragement, we can make poor decisions based on crushed emotions instead of truth. Obviously, choosing this self-destructive path is not God's best for our lives.
Though we'll all face disappointment from time to time, believers are not to wallow in it. Instead, God wants us to trust Him with everything—even our unmet expectations and deepest sadnesses. Remember, there is divine purpose for everything He allows to touch His children's lives (Rom. 8:28).
This song is perfect for today's word:
Encourage Yourself by Donald Lawrence and the Tri-City Singers. :)
Friday, July 8, 2011
Flying Disappointment
I am not one to complain, but this is a NO-NO! All of the shrimp in that area of my plate were all full of it. :(
Clean shrimp please :)


Subscribe to:
Comments (Atom)